Knowing how to fix uneven spray paint is as essential as knowing the correct spray painting technique; it will help you produce pro-like spray paint results. If you’re yet to start painting and are looking to avoid errors with your spray paint job, you’re in the right place.
However, if you thought you had a hang of the spray painting technique but the painted surface looks anything but even, keep reading.
This article will guide you through the types of uneven spray paint, the causes, how to fix uneven spray paint jobs, and how to avoid such paint errors from happening.
Let’s jump right in.
How to fix uneven spray paint
- Sand down the uneven paint and clean the surface
- Set up your spray gun
- Test the spraying pressure and make adjustments
- Find and maintain the correct spraying distance and angle
- Begin painting
- Final touches
- Clean Up
Causes of uneven spray paint
Here’s a brief of the various causes of uneven spray paint.
Insufficient surface prep
You would end up with uneven spray paint if the painted surface didn’t go through proper preparation and cleaning. For example, the surface you’re painting might have had stubborn debris, oil deposits, or residues left by cleaning products.
Also, you may have blotchy spray paint if the painted surface was still damp when the painting process began. In this case, you will notice paint drips, bubbles, or blisters on the painted surface.
Thick coats of paint
If you apply thick coats of paint using your sprayer, you will have an uneven spray paint job. Thick coats of paint will easily drip and leave the surface looking spotty. When spray painting a surface, it’s always best to apply thin coats in multiple layers instead of one thick coat.
Inefficient set-up of the spray gun
A poorly set-up spray gun will have the paint either leaking too fast, too slowly or even thicker than recommended. If you fail to notice it in time, you will end up with an uneven spray paint job.
Always follow the manufacturer’s instructions on assembling and using the spray gun you’re using. These instructions will also guide you when testing and adjusting the paint pressure.
Also, pay attention to the angle of the spray nozzle tip because it determines the angle with which the paint flows. The wrong angle can easily result in a paint overspray.
User error
Spray painting looks effortless and fun, but it’s also easy to mess up. Some mistakes you can make include spraying too close to the surface, tilting your wrist as you spray, or not letting the paint dry sufficiently between coats.
Before handling any paint job, always practice on cardboard or scrap wood. Once you have the hang of the equipment and the process, go ahead and show off your expertise with the spray paint project.
Types of uneven spray paints
Paint drips, orange peel, and fish eyes are the common types of uneven spray paint you may notice on your surface. Let’s dive deeper into how uneven paint occurs.
Paint drips
This is one of the most common types of uneven spray paint. Paint drips form when you use too much thinning agent while thinning the paint for spraying. In other cases, paint drips can result from unnecessary air pressure in the can while you spray the paint.
Fish eyes
You’ll be able to identify fish eyes on your spray-painted surface by the circular craters they form.
This type of uneven paint is primarily caused by contamination of the air stream while you expel the paint. If wax or oil gets on the air stream or is on the painted surface, fish eyes will form on the painted object.
Orange peel
This paint error is characterized by tiny pores on the surface, exactly like the texture of an orange peel. This paint error comes about when you use the wrong paint thinner. Or, you may have applied several coats of paint without allowing sufficient dry time between coats.
You can also end up with orange peels if you spray paint on a rough-textured or dirty surface or use the wrong spraying angle.
How to fix uneven spray paint job (Any Surface)
DIY projects are the best avenues for learning and perfecting a skill. If spray painting is a technique you’re learning and already messed up, this section will guide you through the detailed ways to fix uneven spray paint on any surface.
If you’re ready to start, assemble the tools and materials listed below to help you get the job done.
Supplies you will need
Sandpaper.
Sanding block.
Wire brush.
Alcohol.
Spray gun or spray can.
New paint
Face mask and face goggles
Cardboard.
Drop Cloth.
Step-by-step procedure
Let’s get to work now that you have everything in your eye view.
Step 1: Surface prep work
Begin by lining the surrounding surface with a drop cloth to catch stray paint. Next, gear up against dust and paint fumes by wearing your gloves, goggles, and a face mask.
Grab a wire brush and scrub off any paint drips, peeling paint, or bubbles. Scrub a section at a time, removing as much paint as possible. You can also wet the paint with denatured alcohol while scrubbing it off with the wire brush.
Move on to sanding the remaining stubborn paint off the surface. Use a sanding block or a power sander with an attached vacuum.
Clean the surface the sanded surface to eliminate debris. Once dry, scuff again with fine-grit sandpaper to even out any marks from previous sandpaper grit. Clean the surface again and let it dry completely.
Step 2: Set up your spray gun
Start setting up your spray gun while waiting for the cleaned surface to dry. The assembling procedure for your equipment will be unique to the type of gun you’ll use.
In any case, follow the manufacturer’s instructions to the letter, especially if it’s your first encounter with one. Ensure the equipment is clean, and the nozzle is angled correctly.
Step 3: Test the spraying pressure and make adjustments
Start testing the equipment and the various pressure settings to determine what works.
For example, a high-pressure setting will expel paint too fast, and you may end up with paint drips. Too slow pressure may have the paint atomizing mid-air before it lands on your surface, forming fish eyes or orange peels.
Therefore, play around with the settings until you have what works. Then try the same setting again with paint and practice spraying on cardboard to confirm the effectiveness of the pressure setting.
Step 4: Find and maintain the correct spraying distance and angle
Spraying distance and position are essential when using a paint sprayer. The recommended distance is 6-12 inches between you and your painting surface. However, this distance varies depending on the type of spray gun.
For example, if you’re using an air-assisted airless spray gun, maintain a 10-12 inch distance. However, if you have a standard gun, keep a distance of about 8-10 inches. Maintain an 8-inch distance when using a high-volume, low-pressure (HVLP) gun.
Also, practice keeping the spray gun at a 90° angle with the target surface. Move your arm from side to side while keeping the wrist steady.
Step 5: Begin painting
Stir the paint thoroughly, mix it with a thinner, and then filter it into the can of your spray gun. Press down the trigger to release a thin coat of paint.
Start spraying beginning from a few inches off the edge of the surface. Move your arm over the targeted surface gradually and stop spraying once you’ve slightly passed the other surface edge.
Slightly overlap the previous coat by one-third to ensure the paint coverage is seamless.
Allow the first coat to dry completely before spraying on the next one. The drying time for spray paints ranges between 30 minutes and 2 hours. However, it’s best to stick to what the manufacturer recommends based on the type of paint you use to prevent issues of spray paint tackiness.
Reapply the next coat once the previous layer of paint is completely dry.
Step 6: Final touches
Assess the painted surface for any signs of imperfection. If you find any, wet sand them with fine-grit sandpaper and wipe them off with a dry cloth. Finish the process by applying a final, thin coat of spray paint. You can follow up up with a clear coat to protect the painted surface.
Step 7: Clean up
Assemble all the equipment used and clean them as recommended by the manufacturer. Clean the spray gun using water or solvent suitable for the type of paint used. Store leftover paint and dispose of any material that’s not reusable.
How to Fix Uneven Spray Paint on wood?
Fixing uneven spray paint on wooden surfaces like furniture or siding is just as easy. Whether you have tried flipping a cheap find or are trying to salvage a poorly done antique, here’s how to get it done.
What you’ll need
Sandpaper 220
Hand sander
Trisodium phosphate
Spray gun
Paint
The procedure.
Start by removing the blotchy paint using Trisodium phosphate (TSP) and rinse the residue with water.
Let the wood dry for as long as necessary.
Sand the surface with 220-grit sandpaper to smooth out the surface. Collect the dust with a vacuum and then wipe further with a tack cloth.
Apply a primer compatible with the type of paint you plan to use. Let it soak into the wood pores for 15-30 minutes. This step is optional.
Start spraying the wooden surface, keeping the paint coats light and even. Two to three coats of paint should be enough, but add more if needed.
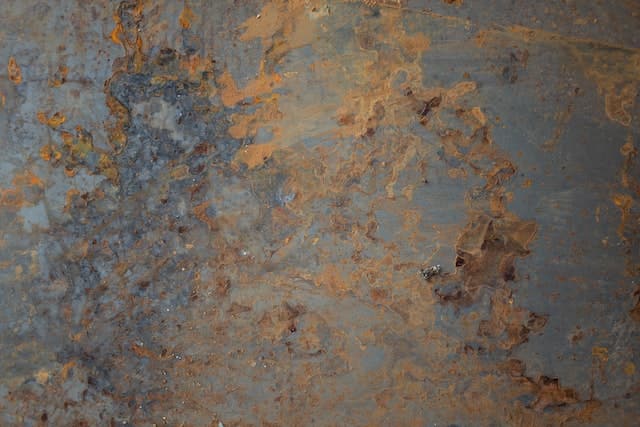
How to fix uneven spray paint on metal?
If your metal surface has paint drips, bubbles, or an orange peel, follow the steps below to fix blotchy paint.
What you’ll need
Sponge
Microfiber cloth
Wire brush
Sandpaper
Paint
Paint sprayer
The procedure
Wipe off the loose debris using a damp rag.
Scrape off as much as possible using a wire brush. This brush is great for removing chipping paint, stubborn debris, and rust from the metal surface.
Sand down the remaining mess of spray paint using fine-grit sandpaper.
Clean the sanded metal surface using a degreaser. Let it dry completely.
Repaint the surface, layering multiple coats of thin spray paint. Ensure each coat dries completely before the next.
How to fix uneven spray paint on the car?
You may have tried to DIY spray paint on your trunk or conceal a scratch. But after completion, you realize that the paint job is a mess. Keep reading below to find out how to fix it.
What you’ll need
Sandpaper
Primer
Paint
Paint sprayer
Clear top coat
The procedure
Step 1: Grab a medium or fine grit sandpaper and sand off the paint.
Step 2: Wash the sanded spot using an automotive rubbing compound. Leave the car to dry up completely.
Step 3: Protect the windows and mirrors from catching a paint overspray.
Step 4: Prime the sanded part if it got to the bare metal beneath; otherwise, you can skip it.
Step 5: Spray the paint on the car, keeping the coats light and even.
Steps to take to prevent Uneven Spray Paint Job
When you know better, you do better. Here are simple practices to help you prevent such a mess from occurring.
Shake the paint well
Sometimes all you needed to do was shake the paint can thoroughly before spraying. This loosens any lumps that may have formed when the paint settled. Shaking also ensures the paint has an even pigment when it lands on the surface and prevents clogging.

Learn can control
You can prevent uneven spray paint by mastering the art of operating a spray gun. This comes down to finding the correct standing position and learning how to glide your arm from side to side while keeping your wrist at a steady angle.
Keep it moving
When spray painting a surface, start painting from off the side, gradually move towards the surface itself, and only stop painting once you’re off the other side. Try to keep the paint moving steadily to ensure the surface is evenly coated.
Otherwise, if you stop or linger with paint on the surface, expect to have paint drips, wrinkles, or start and stop marks.
Spray from the right distance
Maintain an average spraying distance of 6-12 inches between you and the target surface. Adjust the distance depending on the type of sprayer you’re using.
Spraying too close to the target will result in paint build-up and drips. On the other hand, spraying too far from the surface will have the paint atomizing before it lands on the surface and form fish eyes.
Light coats are better.
The rule of thumb here is that multiple light coats are better than one thick coat. Applying light coats will give you an even coating on the surface, while thick coats will easily end up blotchy.
Clean your paint sprayer
Before using your sprayer, ensure it is clean and that no paint is trapped in the nozzle. A clean sprayer expels the paint in a fine mist, uniformly coating the surface. On the other hand, a clogged spray nozzle tip will have the paint dripping or coming out with lumps.
FAQs – How to fix an uneven spray paint job
How do you fix an uneven spray paint job?
Start by dry or wet sanding the uneven paint off the surface.
Clean the sanded surface with a degreaser at your disposal. Let it dry completely.
Prime the surface if needed.
Apply a fresh coat of spray paint.
Recoat the area once the previous layer dries.
Why does spray paint look uneven?
Spray paint could look uneven if it were applied in thick coats. Alternatively, insufficient surface preparations or inefficient set-up of the spray gun can result in uneven paint. Another reason is user error characterized by wrong spraying angle and distance, lingering on the spot, or stopping mid-surface.
Why does my spray paint look textured?
Spray paints can look textured if you spray them standing farther than 12 inches from the surface. This spraying distance prolongs the interaction of paint with air, causing it to atomize before it hits the surface. The result is a grain-like textured surface.
Why does my paint look patchy?
The paint looks patchy because you may have used too much paint thinner with too little paint. The thinner evaporates fast, leaving the surface with barely any coverage. Sometimes, the paint will look patchy if applied unevenly, overspread, or moving the sprayer too fast over the substrate.
Why does my spray paint look bumpy?
Spray paint will look bumpy if you spray it too far from the surface, and it partially dries before hitting the surface. Alternatively, you may have sprayed a surface contaminated with oil or wax or sprayed the paint without shaking it well, and it came out chunky.
Why is my paint sprayer splotchy?
The paint sprayer can become splotchy if it’s inefficiently set up. For example, the pressure setting could be wrong, or the paint sprayer nozzle is clogged with paint. Sometimes, the spray angle and too close a spraying distance will leave the painted surface looking splotchy.
Summary – How to fix uneven spray paint
We hope you have enjoyed the tips we have shared on how to fix uneven spray paint. Regardless of the type of surface –wood, car, or metal –with messed up spray paint, you can salvage it easily by following the steps outlined.
We’ve also elaborated on the various causes of uneven paint, the major types, and, most importantly, how to prevent the occurrence of uneven spray paint.
If you liked this article, kindly share it with anyone you think would greatly benefit from the information shared. See you at the next one!