Spray painting is by far the easiest, fastest, and most affordable way to create a nice long-lasting finish on any surface.
If done right, you can achieve a high-quality and professional finish on any substrate – a bedside table, a wall, a pair of Crocs, or ornamental items.
In this guide, I will show you how to get a smooth finish with spray paint. I have acquired these methods, tips, and tricks over several years of undertaking professional painting jobs. Let’s dive in.
How to Get a Smooth Finish With Spray Paint
Start by getting everything right, from the tools to cleaning, sanding, and thoroughly preparing the surface. Next, you should learn how to hold the spray can from the right angle. The materials needed include good-quality spray paint and primer, both of which should be compatible with the substrate material to achieve that sleek shiny finish.
Can you Get a Good Finish with Spray Paint?
Yes, you can. And you don’t have to be a pro to create a professional finish. You just need to learn to do it like a pro. Because one of the advantages of using spray paint instead of brushes is the versatility and ease of use.
If you have tried spray painting before, you probably noticed that a few light coats of spray paint are much better than a single thick one with a brush. With such, you don’t have to contend with annoying brush strokes.
And the average paint project with a brush takes around six hours before it’s dry and complete, while spray painting can reduce this time by half an hour, drying time included.
The catch here is speed, affordability, the ability to spray paint any surface or material, ease of use (if you can control the can), and little to no spray paint dripping.
The only challenge you might experience (especially if you’re a beginner) is uneven surfaces where the outcome of your paint may not be as smooth or sleek as you’d want.
This happens to many novice painters, and yes, I also faced the same problem before I learned how to get a good finish with spray paints.
It can be due to inadequate preparation, poor choice of paint vis-à-vis the substrate material, unfavorable weather conditions, and holding the can from the wrong angle.
Fortunately, you’ve come to the right place, and as someone with the benefit of hindsight and experience, I’m here to guide you on how to make spray paint smooth. Most importantly, I’m here to reassure you that you can get a smooth finish with spray paint, no matter how many times you’ve tried unsuccessfully.
First, let’s start by understanding how much spray paint you need to apply because too much of it can ruin your work, and too little may not work either.
How Much Spray Paint Will I Need?
For a successful spray painting project, you must determine how much spray paint you’ll need so you don’t buy more or less than you need.
The problem with having a lot of leftover spray paint is wastage. If you won’t have any more spray painting projects after the current one, you’ll have to store or dispose of the surplus paint.
This presents another problem. The paint can expire on the shelf or be damaged by extreme weather like winter. Disposing of it is not economical either, and you’ll also need to ensure you do it safely.
On the other hand, you risk ruining your project if you run out of paint before you’re done. Rushing to the store to get a new paint can in the middle of a painting job is not only tedious but frustrating.
That’s why you must have everything ready in one place, and knowing how much paint is required is crucial.
So depending on your project size, get at least three spray paint cans of your favorite colors ready before starting.
The number of spray cans should be proportional to the size of the project. If it’s just a single item you want to paint, a can or two will be enough. More cans will be needed if it’s a larger surface or several items.
What Surfaces Can I Spray Paint?
Spray paint’s greatest attribute is versatility. There’s spray paint for anything, whether on rough, nonporous surfaces like brick and asphalt, complex areas like grout, sensitive items like cars or glass, or common household items like furniture.
Here are a few examples of certain materials you can spray paint.
- Plastic and PVC materials
- Metal and aluminum
- Cardboard and paper
- Wood, MDF, and particle board
- Rubber
- Fiberglass
- Mirror and glass
- Masonry and concrete
Canvas and fabric
From the above list, you can be sure that your paint will stick on any surface, whether porous or nonporous. And the best part is, there is special spray paint for specific materials like glass, rubber, and metal, which adheres perfectly.
Another thing to keep in mind is the nature and condition of the substrate and the paint’s capacity to adapt to or withstand certain conditions.
For example, if you plan to spray paint tires, consider the paint’s ability to withstand outdoor elements like UV lights, moisture, and rain.
Or if it’s a brass lampshade or fireplace insert frame, can the spray paint withstand heat? Always look for paint that is compatible with the object and the environment it will be used in.
How To Get A Smooth Finish On Different Surfaces: The Tips
Let’s get to our initial question: how to achieve a fine finish with spray paint. Back when I was a novice, I made many mistakes in a case of trial and error. But it’s been several years since I tried my first spray painting project, and I’ve learned much over time.
If I had known and followed these steps, I wouldn’t have made all those mistakes which is why you’re lucky to be here. I’m going to take you through these easy and practical steps, which, if you follow to the latter, you’ll love the outcome of your paintwork.
Begin by Setting Up a Good Environment
Whether you plan to work outdoors in the yard, in the garage, in one of your empty rooms, or in the basement, ensure the environment is appropriately set and conducive for spraying.
You can spread cardboard pieces on the ground to avoid the paint getting on the floor or grass. You can even use a raised platform of wood on which to place the object as you paint.
In addition, make sure the weather is favorable for spray painting: not windy, rainy, or too humid. Good weather helps accelerate drying time, which is a sure way of achieving a smooth finish. If working in a room, keep it well-ventilated.
Gather Your Equipment and Tools
Gather everything you’ll need and get them in the same place. Spray painting requires maximum concentration, and the last thing you want is to stop midway to pick an item you forgot.
Have all the spray paint cans, primers, gloves, masks, goggles, and everything else you need in one place before you start working.
Choose the Right Spray Paint to Work With
While shopping for spray paint, you’ll come across lots of options to choose from. You can pick the best by reading the label to determine the paint’s compatibility with the material you want to paint.
Sanding or Deglossing
A smooth substrate aids in creating a smooth finish. Check the object you want to paint. Does it have gloss, oil, grease, or similar pollutants?
If so, you’ll need to lightly sand and degloss it as part of the prep work. A 220 fine-grit sandpaper would be ideal for removing the dirt and grime, or if you prefer a less messy procedure, a deglosser will do.
To Prime or Not to Prime?
This step may seem unnecessary and just another load of extra work, but it’s vital that you prime the substrate before painting it.
Priming helps the paint stick better and improves the finished look. It’s one way to ensure a long-lasting and professional finish.
Applying a primer helps you avoid using too many coats of paint and prevent the base from showing, so you end up with a lighter, smooth texture. Some paint brands come in a two-in-one package containing a primer.
If you’d rather not prime your work, you can use such a combo to make things easier
Prepping is Crucial, Don’t Skip It
Permit me to repeat this, but you can only expect to achieve a durable professional finish with good preparation. Just clean the substrate, sand, and degloss, mask the necessary spots, and prim it up. This is the hardest part of spray painting and the most critical.
The key to a smooth finish is a clean, dry surface that paint can easily adhere to, so don’t skip this step.
Observe the Weather
Weather can make or break your project. Some of the problems I encountered with spray paint were weather-related.
At one time, I painted under high humidity levels and, not being the wiser, ended up with a project that took forever to dry. You can avoid these challenges by ensuring you work under favorable weather.
And by favorable, we mean a 50 to 90 degrees Fahrenheit range and humidity levels of 40% to 50%. In short, the weather should be sunny and calm. The warmer the temperatures, the better.
Use a Spray Handle Attachment
Maintaining consistency is a challenge for most people, which is the primary cause of uneven finishes. If you’re a beginner, you can make things easy by utilizing a spray handle attachment.
This handy contraption not only helps with consistency but also helps you avoid hand and thumb cramps that you might experience from clutching and holding the spray can in a specific position for too long.
While using the handle attachment is not necessary, it’s a welcome addition when you want to make spray paint smooth.
Test the Spray Paint
To avoid potential inconveniences and uneven outcomes when spray painting, try testing the paint on a different object before you begin. Use cardboard or paper for the trial piece, and keep the can at least 8-12 inches from the surface.
Apply light even coats and observe how it adheres to the substrate. If you notice the paint forming a pool or thick dots, it means the can is too close to the surface. Otherwise, a smooth finish should be characterized by a light, even mist.
Every spray paint brand has a unique nozzle with varying spray patterns. Your nozzle may produce a cone shape or a flat line.
You may have to adjust between the two. Before switching to the initial project, you should familiarize yourself with these patterns. Also, check for and fix any blockage issues on the nozzle as a precautionary measure.
Apply Thin Layers
Once you’re confident enough to begin spraying on the substrate, start by applying a light, thin coat, and don’t worry if you notice some areas underneath the surface are visible. It’s much better to apply several light coats instead of a few heavy ones.
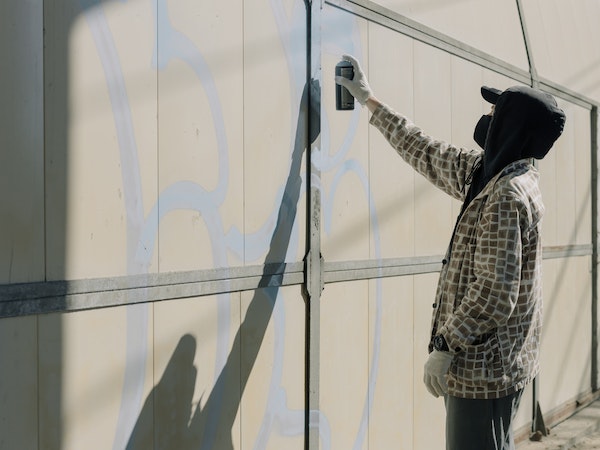
Begin by spraying the sides, moving on a level line until the opposite edge is covered. Avoid the urge to arc your arm, as this will cause inconsistency on the side and middle of the surface.
Also, don’t stop midway or change the angle once you start painting. Otherwise, you’ll pass over some areas and apply heavy coats on others. This inconsistency will result in a pool of wet paint in some areas, which is a perfect recipe for blotchiness.
If this happens, you’ll have to wait for the paint to dry, sand it off and reapply a new coat on the affected surface. You don’t want to deal with that, so keep the can controlled at the right angle to avoid inconsistencies until you get to the final coat.
Maintain Consistency
Spraying too far away from the object results in dripping, paint hardening, and spraying on the wrong surface. The result is usually blotchiness which occurs due to hardened paint.
You’ll also end up with a mess when you overspray nearby items by accident. Not to mention that much of the paint will evaporate in the air, causing unnecessary wastage.
You can avoid all these by maintaining consistency throughout the painting process. Stand at the right angle from the object and spray in a sweeping motion to create even strokes while not being too close to the object being spray painted.
Pause in Between Coats
After applying the first coat, wait at least 30 minutes or an hour for the paint to dry to the touch before applying the second. This time depends on temperature and humidity levels. On average, you’ll have to apply 2-4 coats to achieve the desired texture and coverage on the final coat.
Leave to Dry
The final step to achieving a smooth surface with spray paint is leaving the spray-painted object to dry. This drying time applies in between coats, where you let the first dry to the touch before you apply another thin coat and so forth until the desired texture is achieved.
It also applies to when the substrate is left to dry and cure completely before it’s used.
The drying time is usually indicated on the spray can, which you should read and understand. After applying the last coat, 24 hours should be enough for the paint to cure before using the spray-painted item.
How Do I Get a Smooth Finish With an HVLP Sprayer?
It’s easy to confuse an HVLP gun with a conventional spray gun because they share similarities.
However, the HVLP sprayer system has low velocity and uses different air and fluid nozzles. An HVLP gun comes in two different forms. It can be a turbine systems gun or a conversion gun.

A turbine system gun comprises a turbine, a gun, and a hose. It produces about 10 PSI of dry and filtered air for the spray gun.
On the other hand, a conversion gun is a cost-effective spraying equipment that works at low air pressure.
The main problem you’re likely to encounter when working with an HVLP spraying system is whether your paint is thin enough to be used with it.
Ideally, for the HVLP spray gun to atomize the paint and create a smooth finish, the paint should be between 20 – 30 seconds in a Zahn 2. It’s advisable to check the paint instructions to see whether the paint can be used with an HVLP sprayer.
If it’s something that you can use with an HVLP sprayer system, then ensure you add the recommended amount of paint thinner before spraying.
Finally, if you still end up with orange peels or blotchiness after thinning the paint, consider fixing the fluid nozzle by opting for something smaller. This way, you’ll control the amount of paint being released from the gun and have better results instead of orange peels.
How to Clean Up After Spray Painting
Spray painting can be messy, and cleaning up is necessary once the job is completed. You could end up with paint stains on your hands, glass surfaces, or car. Here are the steps to clean up in such situations:
Cleaning Spray Paint Off Hands
Consider something more effective than water and soap to clean spray paint stains off your hands. Citrus degreaser works best in such a situation, and a good example is Fast Orange. If you don’t have a degreaser, use acetone, nail polish remover, or household cooking oil instead.
Cleaning Spray Paint Off Glass
Glass is delicate but easy to clean. Mix dish soap with water and transfer to a spray bottle. Next, wet the glass and carefully scrape off the paint using a razor blade scraper.
The solution will loosen the paint and help prevent the razor from scratching the glass. Once the paint is off, wipe it with a clean rag.
Cleaning Spray Paint From Cars
Sometimes the wind may blow away paint while spraying, and you could end up with some stains on the exterior of your car. If that happens, fret not. Get some Butter Wet Carnauba Wax, a natural oil with powerful paint-breaking properties that can leave your vehicle shining in minutes.
How to Troubleshoot Uneven Spray Paint
Mistakes happen, and you may encounter a few here and there that may leave you with an uneven surface or drips. If that happens, worry not, as it’s fixable. Troubleshooting rough spray paint is possible, but it requires patience. You’ll have to wait for the paint to dry, sand it, clean it up, then reapply a new, even coat on the affected surface.
Best Spray Paint to Use for a Smooth Finish
From experience, paint quality plays a crucial role in the outcome. I’ve worked with different types of spray paint and discovered that some adhere better and create a smooth finish than others.
Different brands make these paints, but Rust-Oleum Painter’s Touch Multi Purpose Spray Paint leads the pack as having a wide selection of primer options, gloss, and matte finish. It can be applied to any material and surface, no matter how complex.
You can also buy it in multipacks of six units. Here’s a painting solution that dries within 20 minutes, the fastest drying time I’ve ever experienced.
In addition, a single unit can cover up to 12 square feet. As an oil-based formula, Rust-Oleum Painter’s Touch Multi-Purpose Spray Paint is odorless and helps to conceal imperfections on the substrate.
Krylon ColorMaster Spray Paint
Our second-best pick is the Krylon ColorMaster Spray Paint. It comes in a 15-ounce package in an extra-large canister and takes around 15 minutes to dry to the touch, which is a little shorter than the Rust-Oleum Painter’s Touch Multi-Purpose Spray Paint.
However, the Krylon ColorMaster Spray Paint comes in several different colors and can be applied on any surface, be it wood, plastic, wicker, glass, or concrete.
Its major downside is the smell which is a little stronger than Rust-Oleum Painter’s Touch Multi-Purpose Spray Paint, but that’s not a deal breaker if you wear the necessary protective gear.
Rust-Oleum Universal All Surface Spray Paint
The Rust-Oleum Universal All Surface Spray Paint is more popular among artists thanks to its gorgeous metallic finish that shines on nearly every material it lands on.
Even better, it doesn’t have a strong odor and can withstand natural elements and extreme weather, making it great for outdoor painting.
This formula takes about half an hour to dry to the touch. That may be longer, but it’s still within the average drying time. It tends to have so many positive attributes that the drying time can be overlooked.
FAQS – How to Get a Good Finish With Spray Paints
Why is my spray paint finish rough?
Spraying too far away from the object could be the reason you end up with a rough surface. This is because the far away you are from the surface, the more likely the paint will atomize and dry before it lands on the targeted area. The result is a grainy feel instead of a smooth finish. You should wait for it to dry, sand it and reapply.
Should I Sand Between Coats of Spray Paint?
You don’t have to sand between coats since it’s entirely optional. Instead, you should be keen on spraying at high speed to maintain the paint’s natural bonding qualities. But if you want to achieve the highest quality finish, you should wait for at least one hour for the paint to harden before light sanding. Strictly use fine grit instead of medium grit sandpaper.
How Do You Get Crisp Lines with Spray Paint?
To get crisp lines, place the tape on the desired line and spray paint along the edge, sealing it with paint. Once the paint dries, add another color over the top. Do this until you have sprayed all your preferred colors. Allow the paint to dry, then peel back the tape at a 45-degree angle.
Content Summary
Achieving a smooth finish when spray painting may seem impossible if you’re a beginner, but it improves with time. The more you practice, the better you get at it, but such trials and errors can be costly.
So how about you follow some proven steps and expert tips from someone who has been there, done that, and can now help you avoid costly mistakes from experience?
This guide has everything you need to know about painting a smooth finish like a pro. If you take your time to go through it and implement the tips we’ve shared here, you won’t have to contend with ugly, uneven surfaces after what could have been a successful painting project. It’s your roadmap to successfully painting things people will love.