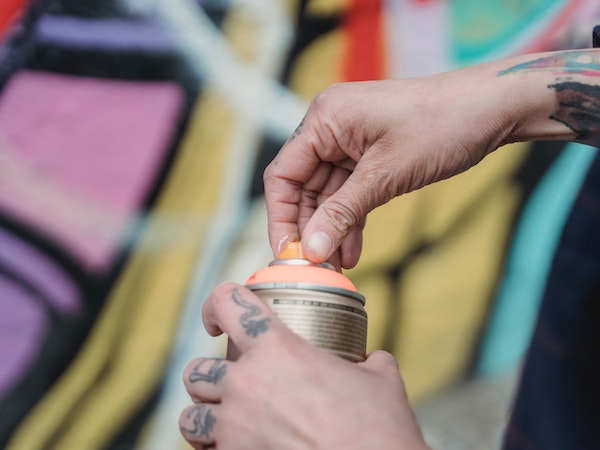
One of the common problems you will encounter when using aerosol cans is clogging. This happens when the nozzle gets blocked with dry paint, so when you press the applicator, nothing comes out.
We know how frustrating this can be, especially when you don’t have a spare nozzle anywhere.
Luckily, you can remove the blockage by applying a few tricks covered in this article.
Next time, you won’t break a sweat when your spray paint can is clogged
How To Unclog Spray Paint Can
To revive a clogged spray paint can, remove the nozzle and soak it in a cup of mineral spirits, paint thinner or hot water. Let it sit overnight; this will dissolve the paint. Use a needle to clear off the softened paint. Then return the nozzle to the can and start spraying.
Why is my spray paint can clogging?
There are several reasons why spray paint cans get clogged and won’t spray . Let’s look at the most common ones:
1. Not cleaning the nozzle
Dried paint chunks in the nozzle can prevent it from expelling paint properly. This typically occurs when there’s excess paint buildup from not cleaning the spray paint nozzle after each use. Over time, the paint hardens and becomes difficult to unclog while obstructing the paint medium.
2. Not shaking the can enough
The nozzle can also get clogged while using a spray can. This could happen if you did not shake the can during initial use and while spray painting. Spray Paint contains different substances that must be mixed well for the paint to flow freely. Not shaking the can enough causes the content not to mix well, which could result in a situation where spray can won’t spray efficiently due to clogging.
3. Storing the can in a cold environment
Clogging can also occur when the can is too cold. This may happen if you store the can in a cold environment like your bathroom or when spray painting in cold weather.
The humidity in the room, combined with dust, can lead to spray paint freezing and create a gunky buildup. Also, when the spray can is too cold, it becomes more difficult for the propellant to evaporate.
4. Using old spray cans
Generally, newer spray cans are easier to spray than old cans. Old cans tend to clog up quickly. So, it’s best to use the product when you just purchased instead of storing it away only to use it two years later.
Can you fix an aerosol can that won’t spray?
Yes, you can. If you can’t afford to get spare aerosol nozzles or buy new paint, there are several things you could do to fix a clogged can.
The method to use will depend on how long the can has been clogged, specifically whether it got clogged during use or while in storage.
It is a lot easier to unclog an aerosol can as soon as it stops spraying. In this case, just invert the can and press the nozzle to expel the paint.
If this doesn’t work or you’re dealing with a tougher gunk from many days of storage, you can use any of the other methods of fixing aerosol can won’t spray discussed in the next section.
How to unclog spray paint can
There are various ways to unclog your spray paint can. Let’s look at each one in detail.
1. Use a Sewing Needle
When a can of spray paint gets clogged, most people will often reach for a needle or safety pin first. And that is understandable since nearly everyone has a needle in their house. This method is fast and effective, especially if the paint is dried; however, it may not remove all the paint.
- Gently remove the nozzle from the can.
- Insert a needle or safety pin into the release mechanism.
- Scrape away the dried paint. Pay close attention to the center of the nozzle, as any sharp objects can damage the nozzle.
- When you’ve successfully removed the paint, fit back the nozzle on the can and try spraying again
If this doesn’t fix the problem, move on to the next step.
2. Using Hot Water
There’s a better way to unclog a blocked nozzle than using a needle. You can use hot water to fix an aerosol can that won’t spray.
There are two ways you can go about this:
First, remove the nozzle from the bottle and place it in a cup of hot water. The heat from the water will soften the paint. Then you can remove any remaining bits of paint with a needle. Once again, be careful when using any sharp object.
Second, you can leave the nozzle attached to the can and wipe the opening with a damp rag soaked in hot water. You will need to wipe it several times to loosen the paint.
3. Use Paint Thinner
The paint thinner method is similar to using hot water. But instead of hot water, we will use a paint thinner, which is more effective in dissolving paints.
- Detach the nozzle from the paint can.
- Pour some paint thinner into a small container (ideally, an expendable cup).
- Place the clogged nozzle in the cup and leave it to soak overnight. This should remove or loosen the clog.
- Dry off the dissolved paint thoroughly with a paper towel.
- Blow hard through the tube at the bottom of the nozzle without letting it touch your mouth
Alternatively, you can leave the nozzle attached to the can. Wipe it with a clean rag soaked in the paint thinner. Test the spray paint on any material you’re not using.
Besides paint thinner, other strong solvents you can use are acetone and turpentine.
NOTE: Paint thinners are toxic, so be careful while handling it. Wear protective gloves and a face mask when handling any issues of spray paint can won’t spray. You should also practice safe disposal of acetone, turpentine, or any strong solvent you choose according the local regulations.
4. Use Rubbing alcohol/vinegar
Vinegar and rubbing alcohol are two other solvents you can use to unclog a nozzle. Simply remove the nozzle and place it in a cup containing either alcohol or vinegar and allow it to soak for a few hours. This might not completely dissolve the lumps of paint, but it will soften it.
You can use a needle to remove the remaining clog in the nozzle. Remember to insert it in both openings. Then place the nozzle in another bowl of warm water to rinse it. Then, leave it to air dry for an hour or more. You can use a hairdryer to speed up the process.
Once the nozzle is fully dry, place it back on the can.
NOTE: Don’t place the nozzle on the can before it fully dries. This is because vinegar is corrosive, so it shouldn’t be allowed to come in contact with the metal can. Likewise, rubbing alcohol can get into the spray can if the nozzle is not completely dry.
Make sure to wear gloves while handling any of the solvents.
5. Use Aerosol lubricant
If the clogging is really bad, you can apply an aerosol lubricant to it. Simply detach the nozzle from an aerosol lubricant; replace it with the clogged spray paint nozzle. Fire short blasts until the spray nozzle is cleared.
Lubricants are usually very greasy, so make sure to wear gloves when trying out this method.
6. Hold the Can Upside Down
Another thing you could do to unclog a can is to turn it upside down. In fact, most manufacturers recommend this method.
Just hold the can upside down, and shake it well. When you do this, the pressure will transfer to the top of the can. As soon as you depress the nozzle, you will get a sharp burst if there’s any blockage in the tube.
7. Spray with WD-40
If you’ve tried other methods that didn’t work, you can try WD-40. There are two ways to use it.
First, detach the clogged nozzle from the paint can.
Spray WD-40 directly into the nozzle to loosen up the paint gunk.
Once the paint is loosened, scrape off the pieces with a safety pin.
After that, give the nozzle time to dry before reattaching it to the spray paint. You may need to repeat the steps a few times until no clog is left in the tip.
Alternatively, you can remove the clogged nozzle from the can. Then, get a WD-40 can, remove its nozzle, and replace it with the clogged nozzle. A quick spurt should clear the nozzle.
NOTE: While handling WD-40, ensure you wear gloves to protect your skin. A mask may also be needed to protect your lungs from the fumes, especially if you’re working indoors or somewhere without adequate ventilation.
8. Replace the nozzle
Finally, if you have a spare nozzle lying somewhere, you can just remove the clogged nozzle and replace it with the one that works. This should be your last resort, or maybe your first if you want to fix spray paint can that won’t spray because of clogged nozzle, if you don’t wish to try any other method.
However, be sure the spare nozzle is of a similar brand and style. Different spray paints have different nozzle styles and sizes to match their viscosities. For instance, oil-based spray paints are usually thicker than the water-based versions, so they don’t use the same type of nozzle.
One quick tip here is to keep empty paint cans for their nozzles.
Or you can simply remove the nozzle and only dispose of the paint can. This way, whenever you need a replacement nozzle, you will have a bank to get it from.
You can throw the nozzles in a cup or bag and store them in your garage. The downside of doing this is that you will find it harder to get an exact match anytime you want a replacement since you didn’t store the nozzles with their bottles.
How to unclog krylon spray paint can
Like Rust-Oleum and other spray cans, Krylon cans also get clogged when not properly cleaned or stored.
To fix it, you can poke the opening of the nozzle with a pin or need. Try wiggling the needle around a bit to loosen the clog. Also, scrap away the paint you see on the outside.
The needle trick will often work, but it should be done with care to avoid damaging the nozzle.
A safer approach is to soak the nozzle in a suitable solvent such as paint thinner, alcohol, vinegar, or hot soapy water. Leave it for some time; this should break down the dried paint.
You can poke with a needle again to remove any remaining block, then try to spray again. This should fix the problem.
How to unclog glitter spray paint can
Glitter spray paint cans have a similar design and style with regular aerosol cans.
These include the “old style” nozzles, which are usually smaller and only spray upright, and the “new style” nozzles which can spray 360 degrees. The former are usually the ones that get clogged easily. To unclog them, you can use any of the methods already described.
First, turn the can upside down and spray for a few seconds. You can also soak the tip in mineral spirits, turpentine, or paint thinner to soften the paint gunk. Then use a thin wire to clean it or blow it with an air compressor if you have one.
Shaking the aerosol can for a minute or two before each use and often during application also helps to prevent clogging.
How to Get Paint Out of a Permanently Clogged Spray Can
The best way to remove paint from a permanently clogged nozzle is to use WD-40. It is quick and easy, just as described above.
Start by taking off the nozzle from the can. Then swap the clogged nozzle onto a WD-40 can.
Next, press the spray nozzle to dissolve any blockage. You may need to do this a few times.
This should fix the problem. Otherwise, if it fails, throw away the clogged nozzle and replace it with one that works! Just be sure the “new” nozzle is the correct type and fits the tip.
One way to ensure you don’t run out of spare spray paint nozzles is to pull them off whenever you want to throw away the paint can.
Frequently Asked Questions: How to Unclog Spray Paint Can
How to know if your spray paint can is clogged
You will know your spray paint can is clogged if the pump is hard to press or the paint is coming out in splatters. Sometimes, because of the clogging, the nozzle will stop spraying. One way to fix this is to run the nozzle under warm water. If this doesn’t work, you can insert a needle into the outlet to remove the lumps of paint.
Why did my spray can stop spraying?
The most common cause of spray paint not spraying is when the nozzle is clogged. Another possible cause is when there’s no more propellant left in the can. This can happen when the paint has passed its expiry date or stayed more than two years past the manufacture date.
Why is my spray paint clumping up?
Clumping occurs when the propellants in the spray paint are not completely mixed. When this happens, the paint is released in uneven proportions. One way to fix this is to shame the can for a couple of minutes to break up the clumps of pigments.
How long should I shake a can of spray paint?
You should shake the can for at least two minutes during the initial use. This will agitate the content and mix the liquified gas (propellant) and paint. Even after the first use, try to shake the can occasionally, say for 5-6 seconds. This is to keep the content mixed and ensure you get quality paint coverage.
Can you add pressure to a spray can?
Yes, you can. If you’re using a spray can and it’s not releasing any fluid, or it stops spraying, but you can still feel liquid inside, you can recharge it with an air compressor. This will repressurize the can and get it spraying again.
What happens when you spray canned air upside down?
If a canned air product is held upside down, the liquefied gas will be forced out, rapidly cooling whatever you’re spraying it on. Also, because the liquid is the one being expelled, not the vapor, it can block the nozzle. To prevent this, spray canned air in an upright position, not upside down.
Conclusion: How to Unclog Spray Paint Can
To conclude, unclogging your spray can shouldn’t be a daunting task if you follow the right steps. We have no doubt one of the solutions above will fix the problem. Always start with warm water, and if that doesn’t solve the problem, you could use any of the other recommended solvents. Luckily, all the items listed here are readily available in the home and are known to soften spray paint. Let us know if you have any more questions about unclogging spray paint can and how to fix spray paint can won’t spray issues. Until then, happy unclogging!