Are you tired of tedious brush strokes and uneven paint finishes when working with latex paint? It’s time to upgrade your painting game! And a high volume low pressure (HVLP) spray may be the solution you need.
HVLP is the best way to attain a smooth, professional-looking outcome in your painting projects without breaking a sweat.
In this blog post, we’ll help you understand how to use HVLP spray guns to transform your latex paint job and escape the frustrations of brush strokes.
Whether you’re a DIY enthusiast or a seasoned painter, get ready to unlock the secrets of spraying latex paint with HVLP and take your painting projects to the next level.
Can You Spray Latex Paint with an HVLP Gun?
Yes, you can spray latex paint with an HVLP gun. HVLP spray guns can handle latex paint effectively, delivering a smooth and even finish. Their low-pressure technology ensures there’s no over-spray and paint waste. Whether you’re painting a large surface or adding intricate details, an HVLP gun will make your painting projects a breeze.
What’s an HVLP Spray Gun?
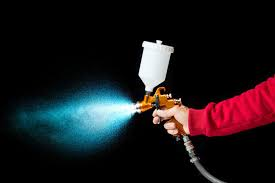
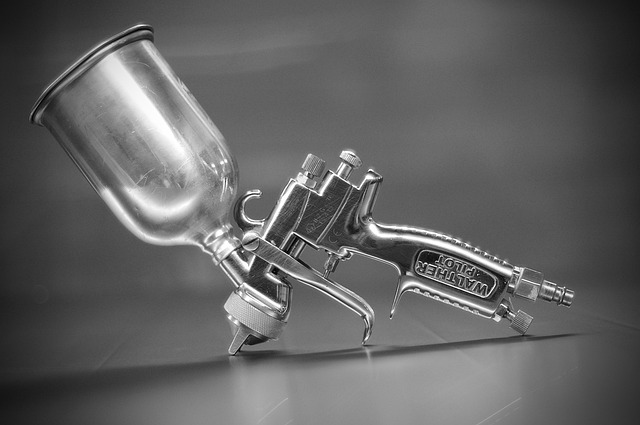
An HVLP (High Volume, Low Pressure) spray gun is a specialized painting gun designed to deliver paint to a surface through spraying.
As its name suggests, it uses a low-pressure setting to atomize the paint into fine particles, which are then sprayed to the surface through the gun’s nozzles.
This technology is contrary to conventional spray guns, which operate on high pressure. It controls the spread and ensures no over-spray, minimizing the wastage of paint.
Why Should You Spray Latex Using an HVLP Gun?
As a professional painter or a DIYer, you may choose to spray paint using an HVLP gun for several reasons.
Here are some of them:
A smooth and even finish: Spraying offers your surfaces a smooth finish, which you may not get with brush or roller painting. Its low-pressure technology allows for precise control and reduces the chances of errors.
High paint efficiency: A HVLP gun reduces overspray and ensures paint efficiency. You can therefore paint a larger surface with less paint at a lower cost.
Time-saving: Spraying paint with an HVLP gun is generally faster than using a brush or a roller. Its wide and efficient coverage can help you complete your painting projects faster, especially if working on large surfaces.
Professional outcome: A HVLP spray gun will give you a higher-quality and more professional-looking outcome than a roller or a brush.
If you’re a professional painter, your clients will be happier with the results of your spray painting job.
When to use HVLP to Spray Latex Paint?
HVLP spray guns can be an excellent choice for applying latex paint in various situations.
Here are some scenarios when using an HVLP gun sprayer will particularly be advantageous:
- When painting large surfaces like large walls and ceilings.
- When refurbishing your furniture to give them new life.
- When painting kitchen cabinets, bathroom vanities, and other indoor cabinetry.
- When working on projects with intricate details like trim and moldings that require high precision.
- When working on a textured surface with crevices and uneven patterns.
- When working on high-quality projects that require professional finishes.
How to Spray Latex With HVLP
Ready to start working on your latex painting project using an HVLP spray gun? Here’s a step-by-step guide on how to go about it to achieve the best result:
What you’ll need (Tools and Materials)
- An HVLP spray gun for air compressor.
- Air compressor.
- High-quality latex paint.
- A pain strainer.
- Latex paint conditioner.
- Personal protective gear (e.g., a respirator, goggles, a pair of gloves, and long-sleeved shirt).
The Procedure:
Paint preparation
Due to its characteristics, spraying latex with an HVLP spray gun requires significant preparation.
Let’s see how you can prepare your latex paint to get a flawless painting job:
1. Thinning
Latex paint has a relatively thicker viscosity than other types of paint, like oil-based paints.
Therefore, for it to flow easily through the gun nozzles, you’ll need to thin the paint a little to lower the consistency.
How do you thin your latex paint?
You can do so by adding a small amount of water at a time (e.g., 10%) and stirring until they mix well.
You can also check the manufacturer’s recommended thinning ratio if provided on the label.
The amount of water to add may vary depending on the brand of latex paint, its thickness, the amount of paint you plan to use, and the specific HVLP gun.
Once the paint achieves a consistency like that of milk, you can be sure that it won’t give you a headache when you start to spray. Further reading in our blog: How to thin latex paint for a sprayer like a pro!
2. Conditioning
If you’re afraid that water will dilute your latex paint and change its color (thinning often changes paint color), you may need to add a latex conditioner to achieve good consistency.
Add small amounts of conditioner into the paint and stir to mix thoroughly. The recommended ratio of paint to conditioner is 8 oz per gallon of latex paint.
This way, you can maintain the original color of your paint and be sure that it will give your surfaces a better finish.
3. Straining
Once your paint achieves the right consistency, you’ll need to strain it to remove any debris or lumps that might clog the HVLP spray gun nozzles.
When the spray gun gets clogged, the spray particles won’t come out, and you may need to go through the hassles of dismantling the gun to unclog it before it works well again.
Use a paint strainer, a paint filter, or a cheesecloth to strain the paint into the gun’s spray cup. When you start spraying, you’ll appreciate the smooth and even flow you get due to straining.
4. Test spray
Always test the spray on waste cardboard or scrap material to verify its consistency before starting your main project.
Adjust the HVLP gun’s settings to achieve the desired spray pattern and coverage. Adjust the spray pressure to the recommended level and start test spraying.
The test spray will also help you familiarize yourself with the gun’s handling and allow you to make any necessary adjustments before starting the project.
Spray Painting Procedure
Now that you’ve prepared your paint and are ready to spray, how do you go about the spraying?
- Prepare the surface to be painted by cleaning it to remove any dirt, grease, or debris. You can also sand the surface if necessary.
- Cover the adjacent areas with cardboard or a plastic sheet to prevent the spray from reaching unwanted areas.
- Put on your protective garments to protect yourself from harmful latex paint particles.
- Since you already adjected the gun’s settings when test spraying, fill the cup with the thinned latex spray and start spraying.
- Hold the gun approximately 6 to 8 inches away from the surface. Maintain a consistent distance throughout the process to achieve an even coat.
- Use steady, overlapping strokes in a horizontal or vertical pattern to cover the surface uniformly. Apply multiple thin coats at a time to prevent drips and ensure a smooth finish.
- Allow each coat to dry according to the paint manufacturer’s instructions before applying the next coat.
- Once you are done spraying, clean the HVLP gun thoroughly with water or a suitable cleaning solution immediately to prevent dried paint build-up. If you are don’t know how to go about this process, then you might find this our article on how to clean a paint sprayer with dried paints helpful.
Should You Add Conditioner to Latex Paint?
Yes. As mentioned, you can add conditioner to your latex paint to give it a smoother consistency and make it easy to flow through the gun nozzles.
Latex paint conditioner is always the best option if you don’t want to add water to your paint.
Many DIYers and professional painters prefer this option since it does not change the color of the paint the way water does. It also gives a smoother finish as compared to paint thinned with water.
What’s the Right Nozzle Size for Spraying Latex Paint?
The right nozzle size depends on the brand of paint, its thickness, and the specific HVLP spray gun to be used.
Generally, paint manufacturers recommend a nozzle size of 1.5mm to 2.5mm. Since they are usually thicker than oil-based paints, most latex paints will spray well with a nozzle size of 1.8-2.5mm.
Be sure to do some test spraying and adjust the nozzle size to ensure proper atomization and smooth spraying.
Pro Tips on How to Spray Latex Paint Effectively
Here are some pro tips on how to spray latex paint effectively to achieve excellent results with your painting projects.
- Invest in a high-quality HVLP spray system. A reliable and efficient spray system will greatly impact the quality of your results.
- Use finish-grade latex paint that’s specifically formulated for spray applications. These paints are designed with the right consistency for spraying and provide better flow, resulting in a smoother finish.
- Before starting on your main project, always perform a test on a scrap material to ensure the spray pattern and paint flow are correct.
- Maintain a consistent distance between the spray gun and the surface to achieve an even coverage (typically, 6 to 8 inches).
- Instead of applying one heavy coat, use multiple thin coats to achieve a professional finish.
- Avoid keeping the spray gun in one spot for too long s this can result in uneven coverage.
FAQs – Spraying Latex Paint With HVLP
Can you spray latex paint through an HVLP gun?
Yes, you can spray latex paint with an HVLP gun. HVLP (High Volume, Low Pressure) spray guns are well-suited for spraying latex paint to provide a smooth and even finish. Proper preparation, like thinning and straining, is necessary for a successful spray job.
How do you thin latex paint for spraying HVLP?
You can thin latex paint for spraying by adding water or a paint conditioner at the manufacturer’s recommended thinning ratios. Mix thoroughly until you achieve the desired viscosity for a smooth flow during spraying. Ensure it doesn’t get too thin so you don’t destroy the paint’s ability to stick.
What’s the ideal pressure for spraying latex paint?
The ideal pressure ranges from 26 to 29 PSI (pounds per square inch). However, it’s essential to check the specific recommendations from the HVLP gun manufacturer. Adjust the air pressure accordingly to achieve the best atomization and coverage.
How much conditioner should you add to latex paint?
The amount of conditioner to add to latex paint can vary based on the specific paint brand and its thickness. As a general guideline, start with a small amount, like 8 oz per gallon of paint, and mix thoroughly. Adjust the amount of conditioner as needed to achieve the desired spraying consistency.
What is the best HVLP gun for latex paint?
The best HVLP gun for latex paint depends on your specific needs and preferences. Several reputable brands offer HVLP spray guns designed for latex paint application, including Fuji, Wagner, and Graco. When selecting an HVLP gun, consider factors like its adjustable settings, ease of use, and overall performance.
Summary – Spraying Latex Paint With HVLP
To wrap it up, if you’re feeling dissatisfied by the sight of brush strokes or the outcome of a roller painting job, an HVLP spray gun could come in handy for you.
Spraying latex paint with HVLP is a game-changing technique that gives you more control over your painting projects and produces a smooth and glamorous finish.
Also, if you’re on a budget and need an efficient painting technique that saves costs, it’s time to invest in an HVLP sprayer.
Not only will you enjoy the painting process, but you’ll also give your surfaces a professional-grade finish that portrays nothing but class!